Getting Started
Getting Started
If your question is not addressed below, contact us through our feedback form and we will get back to you shortly.
- What is IDrive® Compute?
- What is a Virtual Private Server?
- Which distributions are supported by IDrive® Compute?
- Where do I get help to get started with IDrive® Compute?
- Can I sign in to IDrive® Compute from the web?
- Can I access and manage my IDrive® Compute account and associated instances from anywhere?
- How does IDrive® Compute let me secure my VPS infrastructure?
- Where are IDrive® Compute's datacenters located?
- I have enabled GitHub sign in for IDrive® Compute but I am unable to authorize my IDrive Compute account. What should I do?
General
- How do I set up two-factor authentication for my IDrive® Compute account?
- How do I configure two-factor authentication for my IDrive® Compute account with Time-based OTP authentication?
- Which Time-based OTP authenticator apps are supported by IDrive® Compute?
- Can I disable two-factor authentication for my IDrive® Compute account with Time-based OTP authentication, in case I lose access to my mobile device?
- I am unable to receive the SMS containing OTP for two-factor authentication. What should I do?
- As an admin, can I enable two-factor authentication for my users?
- How do I disable two-factor authentication for my IDrive® Compute account?
Two-factor authentication
IDrive® Compute is a reliable and fast-performing edge computing solution with multiple edge regions around the globe. Businesses can use the Compute infrastructure of powerful physical servers and robust hardware resources, managed off-premise, to host NVMe-powered instances.
Create and manage multiple virtual and bare metal machines, run projects of any size with minimal latency, perform scheduled backup for the instances, take snapshots in real-time, and attach more space to them with block storage volumes - all from a centralized web console.
What is a Virtual Private Server?
A Virtual Private Server, commonly known as VPS, is a virtual machine dedicated to the needs of the users. A VPS acts like an actual computer that can be used to store information and run programs or applications from anywhere without being tied to a particular physical machine.
Every VPS has its individual operating system and a specific amount of hardware resources that is split among the users on that server. Thus, each VPS is isolated from the others in the same server and can be rebooted separately.
A VPS is lower in cost compared to a dedicated server but provides better reliability, security, and performance than shared hosting.
Which distributions are supported by IDrive® Compute?
IDrive® Compute supports the following standard distributions of 64-bit Linux operating system:
Where do I get help to get started with IDrive® Compute?
To use your IDrive® Compute account and VPS infrastructure effectively, explore our FAQs, available on the official website.
Can I sign in to IDrive® Compute from the web?
Yes. IDrive® Compute is a web-based application. To create virtual instances or to perform other activities from your IDrive® Compute account, you have to sign in to its centralized web interface from any supported browser.
Can I access and manage my IDrive® Compute account and associated instances from anywhere?
Yes, you can securely access and manage your IDrive® Compute account from anywhere in the world over the web, with just an active Internet connection. Using our easy-to-use web console you can easily create, access, and manage virtual instances from wherever you are.

How does IDrive® Compute let me secure my VPS infrastructure?
IDrive® Compute web console provides several security features for the safe processing of your critical business data and personal information. Implement SSH key-based authentication, optional root login, and firewalls to control network traffic while configuring the VPS infrastructure.
Where are IDrive® Compute's datacenters located?
IDrive® Compute's datacenter regions are hosted at 9 locations. Run a network speed test to choose the best location for your instances.
I have enabled GitHub sign in for IDrive® Compute but I am unable to authorize my IDrive Compute account. What should I do?
You will have to reload the session to authorize your IDrive® Compute account for GitHub sign in. To reload the session, on the Authorize IDrive Compute page click Reload.
Note: Once you authorize your IDrive® Compute account for GitHub sign in, it may take some time to allow sign in.
How do I set up two-factor authentication for my IDrive® Compute account?
Two-factor authentication provides additional security to your account and helps in preventing unauthorized access. It requires users to enter a verification code in addition to their password for signing in. The code can be received on the registered email address or phone number or generated via any Time-based OTP authenticator app.
To enable two-factor authentication,
- Sign in to IDrive® Compute and click your username at the top-right of the screen.
- Select My Account and navigate to the Security tab.
- Under the Two-factor authentication section, click Enable.
- Select Email Address or Phone Number or Time-based OTP authentication as your preferred method of receiving the one-time verification code and click Confirm. If you have chosen Phone Number, enter the same and click Send Code. Click here to know how to set up via Time-based OTP Authentication method.

- Enter the verification code sent to your registered email address or phone number and click Verify & Enable. A message is displayed to indicate two-factor authentication is successfully enabled.
To sign in after two-factor authentication is enabled,
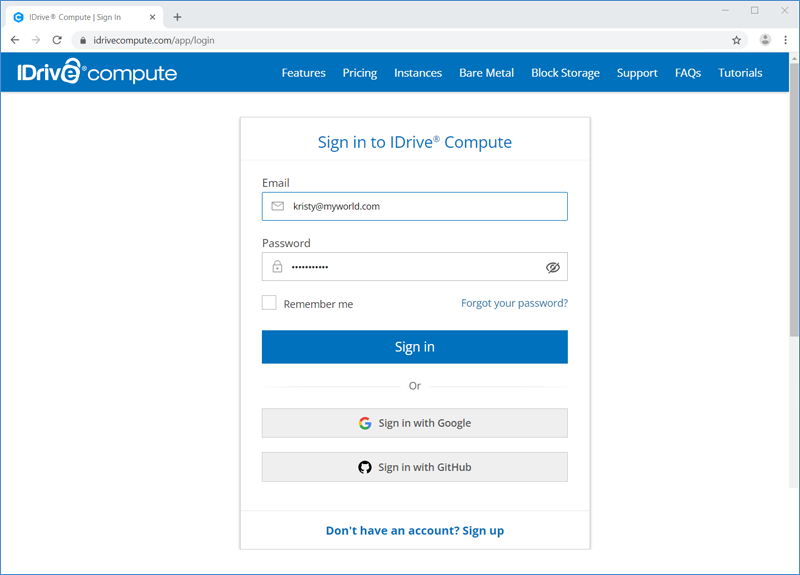
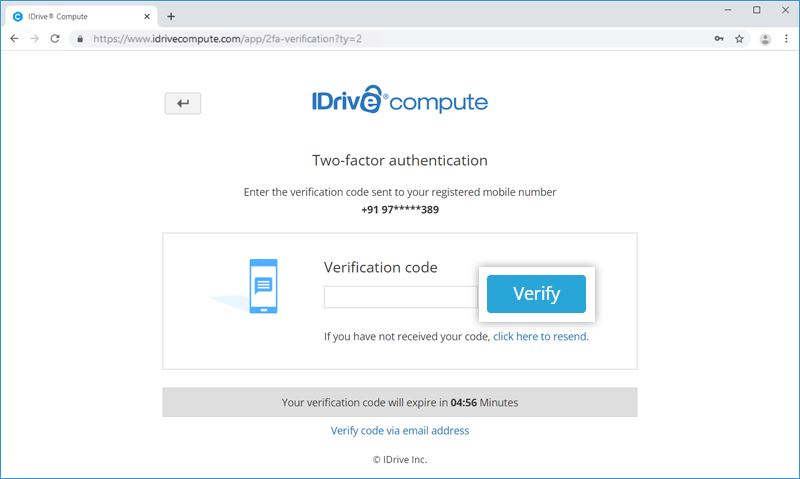
- On the sign in screen, enter your username and password and click Sign in. You will be prompted to enter a verification code sent to your registered email address or phone number.
- Enter the code and click Verify.
How do I configure two-factor authentication for my IDrive® Compute account with Time-based OTP authentication?
To configure two-factor authentication for your IDrive® Compute account with the Time-based OTP authentication method, you will need to enter a verification code generated by the Time-based OTP authenticator app installed on your mobile device.
Follow the below steps to configure two-factor authentication with the Time-based OTP authenticator app:
- Sign in to IDrive® Compute and click your username at the top-right of the screen.
- Select My Account and navigate to the Security tab.
- Under the Two-factor authentication section, click Enable.
- Select Time-based OTP authentication as your preferred method of receiving the one-time verification code and click Confirm. See supported TOTP apps. This will open the 'Enable Time-based OTP authentication' window.
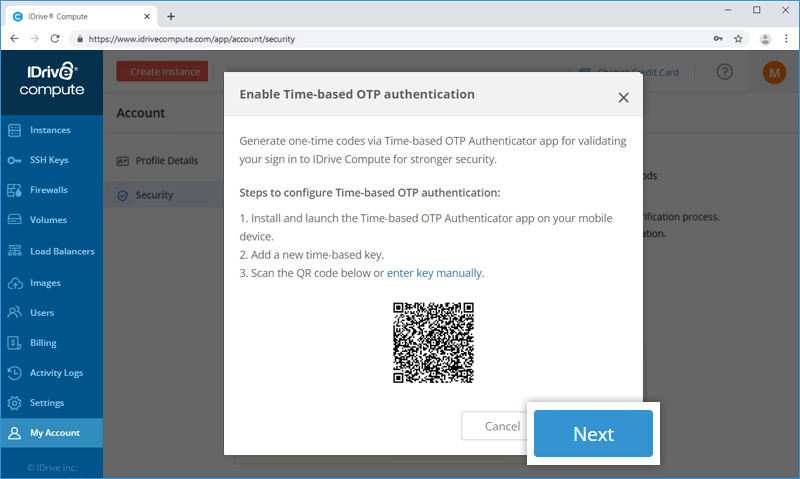
- Install and launch any Time-based OTP authenticator app on your mobile device and scan the QR code displayed on your computer screen. Alternatively, you can also view the key by clicking on enter key manually and type it manually on your mobile device and click Next.
- Copy and save the recovery code displayed on your computer screen securely or click Download to download and save as a .txt file. Click Continue.
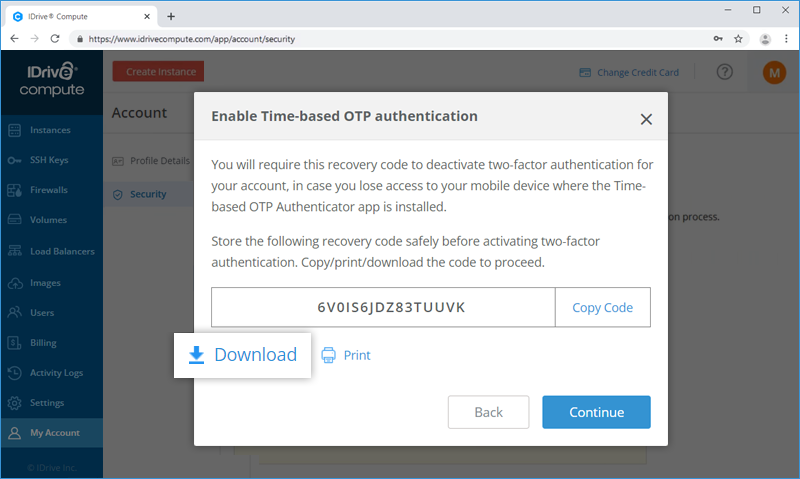
Note: You will require the recovery code to deactivate two-factor authentication for your account, in case you lose access to your mobile device where the Time-based OTP Authenticator app is installed.
- Enter the one-time code generated by the Time-based OTP Authenticator app in your mobile device and click Enable.
To sign in after two-factor authentication is enabled with Time-based OTP Authenticator,
- On the sign in screen, enter your username and password, and click Sign in.
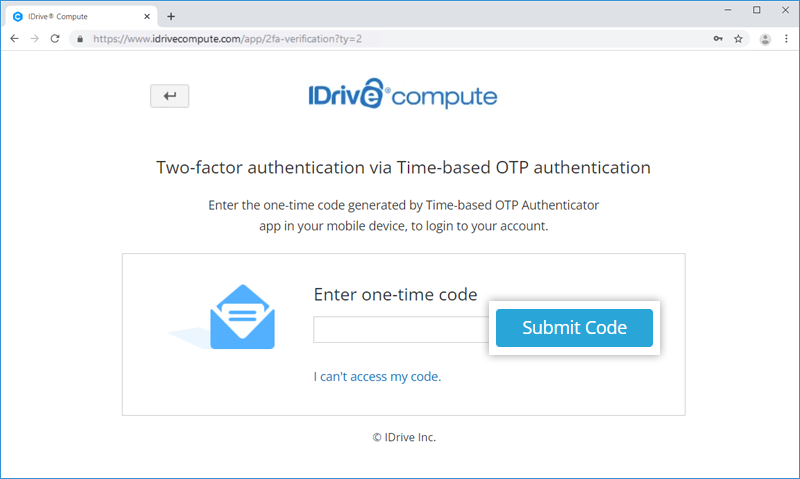
- You will be prompted to enter the one-time code generated by the Time-based OTP Authenticator app in your mobile device.
- Enter the code and click Submit Code.
Which Time-based OTP authenticator apps are supported by IDrive® Compute?
IDrive® Compute supports the following Time-based OTP authenticator apps:
- Google Authenticator (Android/iPhone/BlackBerry)
- Duo Mobile (Android/iPhone)
- Microsoft Authenticator (Android/iPhone/Windows Phone 7)
- Okta Verify (Android/iPhone)
- Authy (Android/iPhone)
- Any other authentication app that supports time-based one-time protocol, or compatible with Google Authenticator
Can I disable two-factor authentication for my IDrive® Compute account with Time-based OTP authentication, in case I lose access to my mobile device?
Yes, you can disable two-factor authentication for your IDrive® Compute account with Time-based OTP authentication.To disable,
- Navigate to IDrive® Compute sign in screen, enter your username and password, and click Sign in.
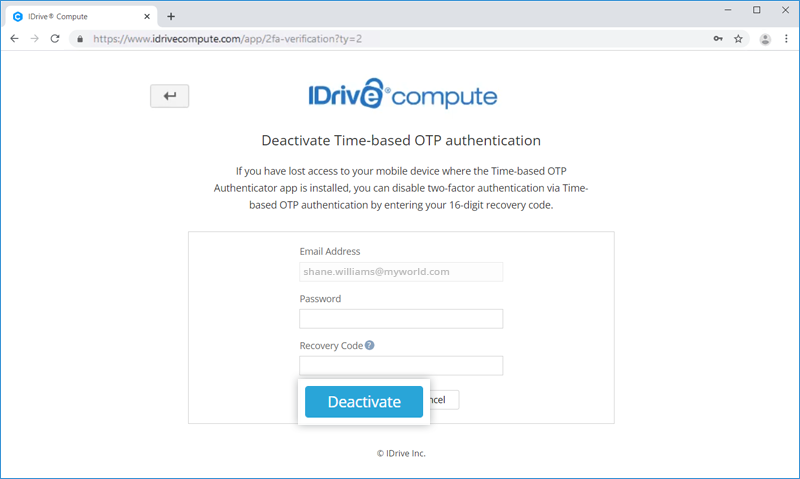
- In the verification code screen that appears, click the link I can't access my code. This will open the 'Deactivate Time-based OTP authentication' window.
- Enter your password. In the Recovery Code field, enter the recovery code received while configuring two-factor authentication for your IDrive® Compute account.
- Click Deactivate.
The two-factor authentication will be disabled for your IDrive® Compute account.
I am unable to receive the SMS containing OTP for two-factor authentication. What should I do?
During the two-factor authentication process, if you are unable to receive the SMS containing the OTP, you can choose to receive the verification code via email address.
Click Receive verification code via email address in the two-factor authentication page.
A code will be sent to the registered email address. You can use this code to complete the verification process.
As an admin, can I enable two-factor authentication for my users?
Yes, you can enable two-factor authentication for your users.
To enable,
- Sign in to your IDrive® Compute account.
- Navigate to the Settings tab and select Security.
- Under the Two-factor authentication for Users section, click Enable.
- In the confirmation popup that appears, click Enable.
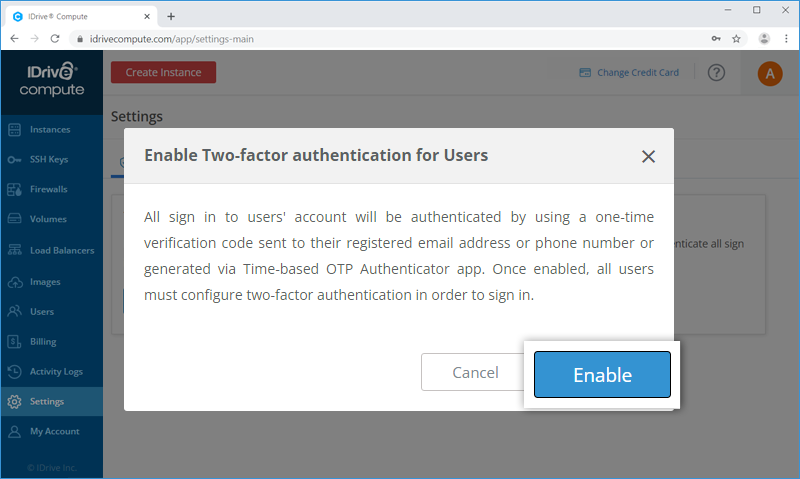
Note: Once enabled, all users must configure two-factor authentication in order to sign in. If you do not wish to configure for all users, you can select and disable it for particular users. Read more.
Once two-factor authentication is enabled by the admin, on the first sign in, users will be asked to choose a method (Email, SMS or Time-based OTP authentication) for receiving the one-time code. Once they verify the credentials via OTP, the configuration process will be complete.
During all subsequent sign-ins, users will need to enter the code sent to their registered email address or phone number, or the code displayed in their time-based OTP authenticator app. To change the method of receiving OTP, users can go to My Account > Security > Two-factor authentication and update the preferences from Email Address, Phone Number or Time-based OTP authentication.
How do I disable two-factor authentication for my IDrive® Compute account?
To disable two-factor authentication for your account,
- Sign in to IDrive® Compute and click your username at the top-right of the screen.
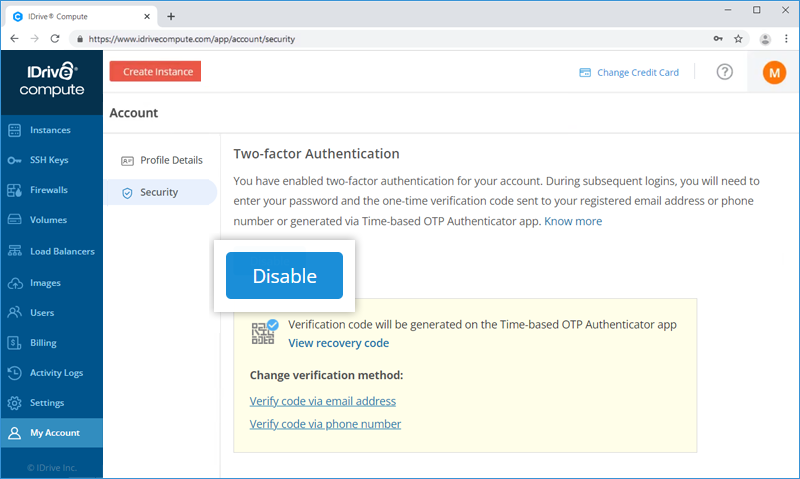
- Select My Account and navigate to the Security tab.
- Under the Two-factor authentication section, click Disable.
To disable two-factor authentication for all user in your account,
- Sign in to your IDrive® Compute account.
- Navigate to the Settings tab and select Security.
- Under the Two-factor authentication for Users section, click Disable.
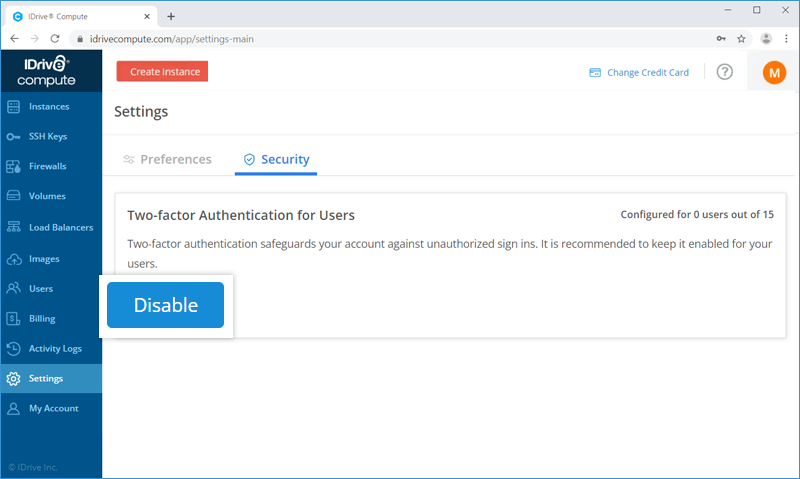
- In the confirmation popup that appears, click Disable.
To disable two-factor authentication for a particular user in your account,
- Sign in to your IDrive® Compute account.
- Navigate to the Users tab. Hover over a user's name, click
 and select Disable 2FA.
 - In the confirmation popup that appears, click Disable.